
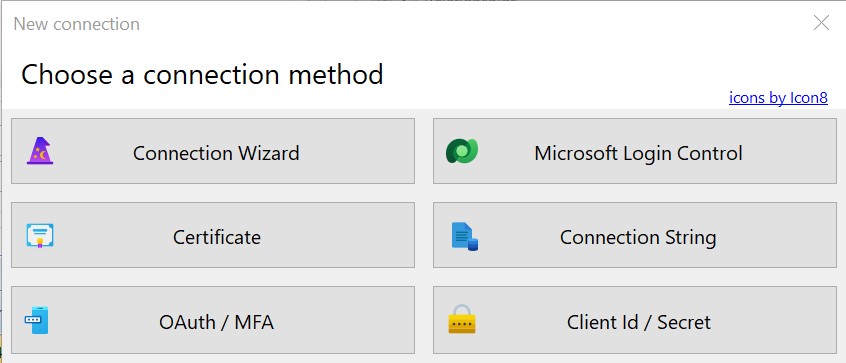
While there a few ways to connect to your environment the OAuth/MFA method is a great method for online environments. In the New Connection dialog select the OAuth/MFA connection method.
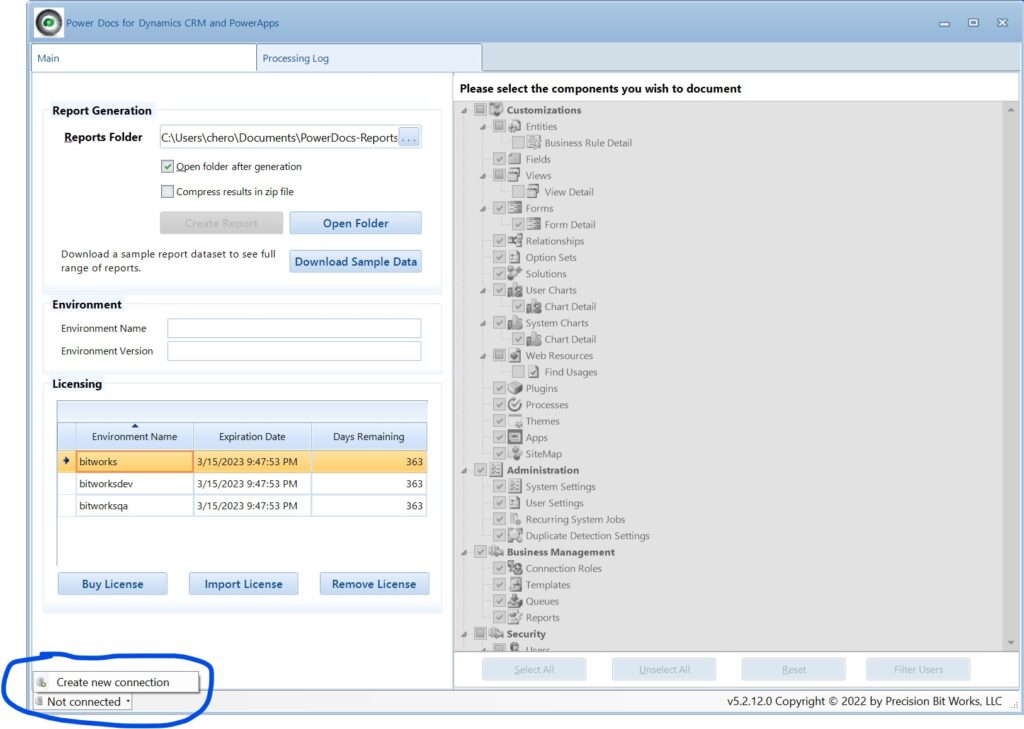
If you are creating a connection for the first time navigate to the status bar area in the bottom left of the application window. It will say the words “Not Connected” in the status bar area. Click on this and select the Create new connection menu option.
After making this selection you will see the New Connection dialog showing you the list of available connection options. Click on the OAuth/MFA button to continue.
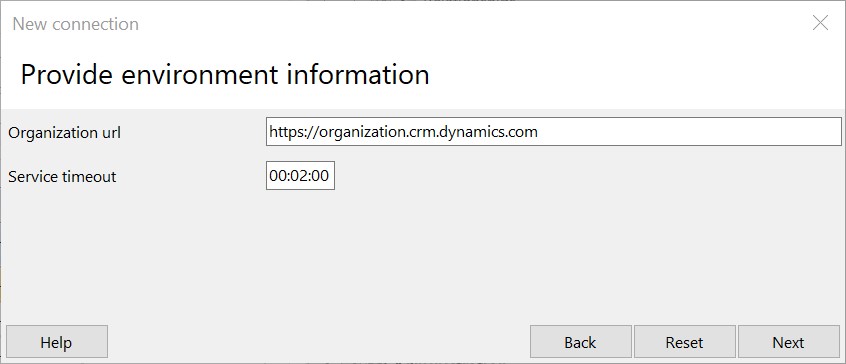
You will see the “New connection” dialog display an “Organization url” field and a “Service timeout” field. If you don’t have the URL of your environment handy, navigate to your system and copy the base environment URL from your web browser including the https:// prefix. If the name of your environment was “myorg” the URL will look like “https://myorg.crm.dynamics.com”. Do not copy of of the typical URL parameters that you would see when navigating to an application such as “/main.aspx?appid=”. You can ignore the “Service timeout” field. Click next once you’ve entered your environment URL into the “Organization url” textbox.
The next screen you will see will be titled “OAuth Authentication” along with 3 fields for the “Azure AD Application Id”, the “Reply Url” and “Username/Email Address”. Below these you will see a button that says, “Use development Azure AD App”. For our purposes the developer application Id and reply URL is fine. One thing to note is in rare cases your domain administrators can disable the Micrsoft default application in which case you would need to ask an Azure AD domain admin to provide one to use with proper privileges to access your environment. In our experience this has never happened, but you should know that it’s in the realm of possibility.
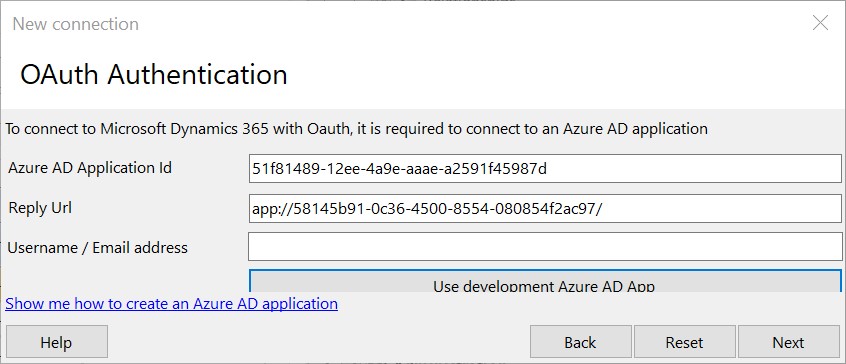
Click on the “Use developer Azure AD App” button. A popup dialog will briefly explain the usage of the app settings. Just click okay to continue. You will see values entered in the fields for you. Next enter your username or email address that you normally use to login to your environment and click the next button. Depending on how your computer is setup you may see a window flash and disappear, or you’ll be prompted to enter your username and password. If you see a window flash and disappear this typically means that your computer is already authenticated to your organization. If your organization has turned multi-factor authenticate you will have to complete this step.
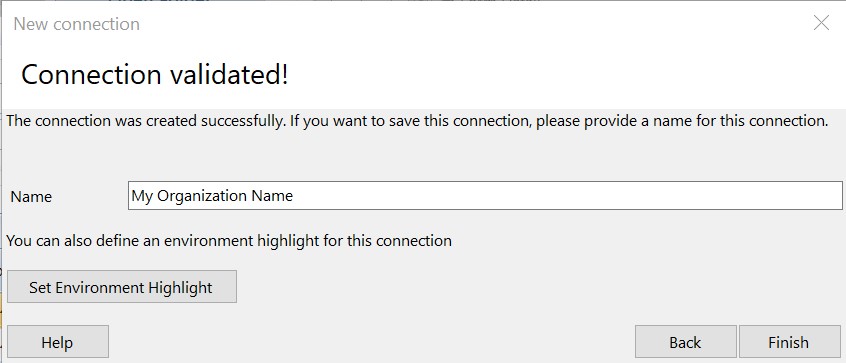
If everything has gone well hopefully you see the Connection validated dialog which will ask you for the name, you would like to use for this environment.
Note: It’s advisable that you include the environment type after the name such as (Dev), (Test), (Prod) so you can easily know which environment you’re connected to especially if you have running reports against multiple environment types. In this case we would name our connection “My Organization Name (Prod)”.
Most people simply use the name of the environment, but the name should ideally indicate the kind of environment such as development, test, production, etc. Once you click the finish button you are all set.
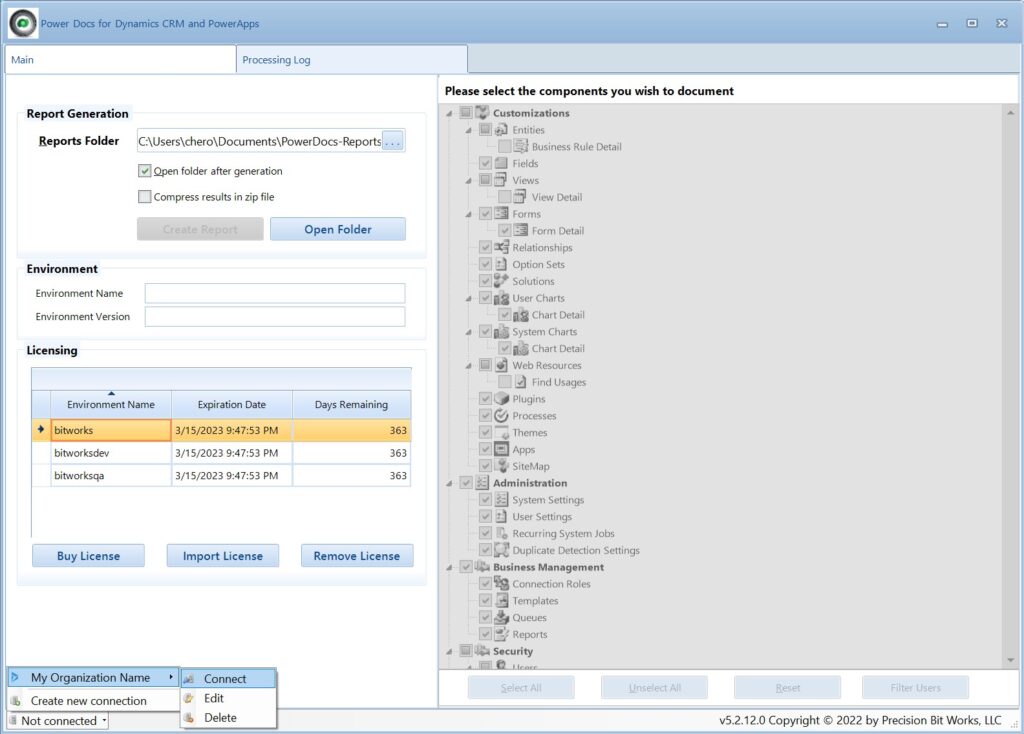
Now that you’ve created your environment connection navigate to the status bar in the bottom left where it says, “Not Connected” and click on the status bar button to show the menu that will display the name you gave to your environment. Hover your mouse over the name and then click on the connect menu option. Once the application makes a connection to your environment the documentation options window will turn white, and you should see the full list of reports you can run. If so congratulations. You are now ready to generate your system documentation.