Application Overview
Power Docs Desktop is a documentation utility built to extract the inner customizations and settings that remain hidden within your Dynamics 365 CRM or PowerApps environments. If you’ve been using the platform for any length of time you will quickly discover that getting at the inner workings of the platform is not easily visible using the out of box tooling provided by the product team. The free tooling available is also not very comprehensive and only provide a small portion of what is hiding inside. Power Docs was created to address this issue.
Whether you’re working for a consulting practice or an end customer it is important to be able to provide system documentation for your project. This is simply not feasible using manual methods. One customer example of a manual documentation effort was a large car manufacturer that paid two consultants to document their system for 6 weeks. The company spent around $30,000 and the amount of documentation was merely a fraction of what Power Docs can generate.
Licensing Overview
Your Power Docs Desktop license is per environment. This means you only need to buy a single license and it can be shared with anyone inside or outside of your organization. If you’re using this as a consulting practice this means you can buy a license to generate your system documentation to give to your customer and you can also share the license with them so they can continue using it on their own.
If you already bought a license, you should have received a license file via email. When you import this file into the application it activates the full set of reports that you can run against your organization.
License Import
The first thing you should do before connecting to your environment is import the license file. The license file will typically have the name of your organization, a date timestamp and have a file extension of “.licx”. Older versions of the license file had a “.lic” file extension. The new file extension allows for you to have multiple environments licensed in a single file such as your development, test, UAT, training and production environments.
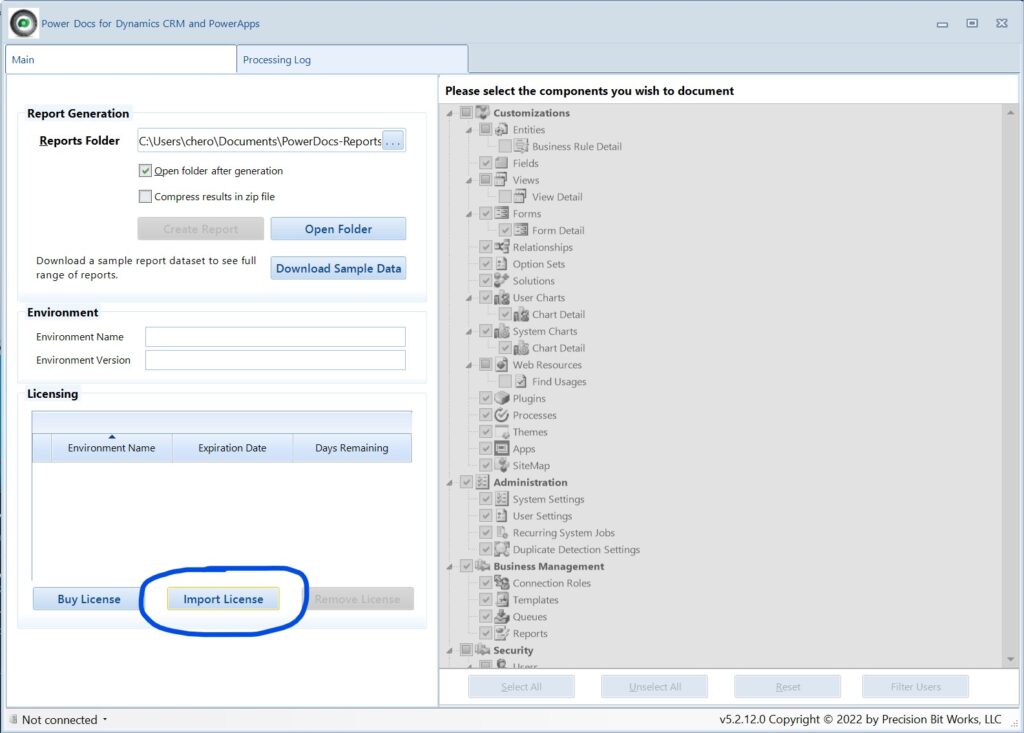
To import your license, save the file attachment out of the license email that you received to your computer. The downloads directory is perfectly fine for this purpose as the file will be imported into the application directory. When you click on the “Import License” button in the Licensing section of the application a file open dialog window will appear allowing you to navigate to the folder where you saved the license.
Once you’ve selected your license file and it has been imported successfully the licensing grid will update with the list of environment names contained in the file. The environment name will typically be the environment prefix that you would normally see in the environment URL before the standard Microsoft domain. For example, if your URL is myorg.crm.dynamics.com the name that will appear in the box will likely be “myorg”. The application can recognize the friendly name, unique name or the URL prefix of your environment, but the URL prefix is the easiest to use for this purpose.
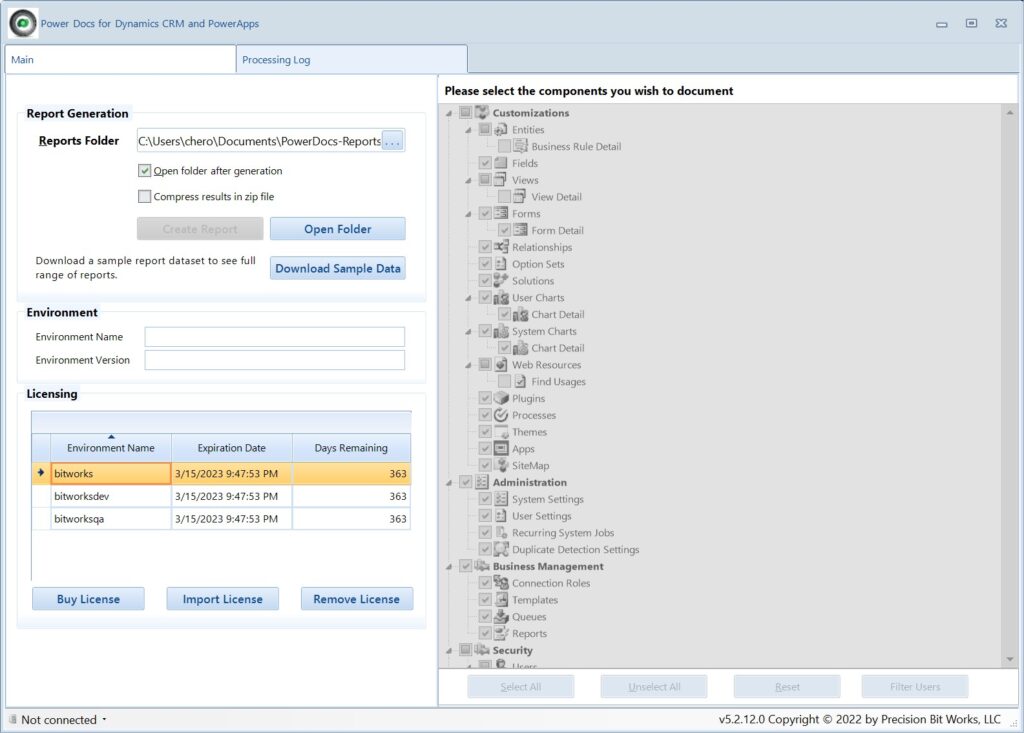
After your license is loaded you will notice in the license grid that it will show the environments found in the license file, their expiration date and the number of days remaining before the license expires.
Connecting to Your Environment
One of the most important tasks in the Power Docs application is creating a connection to your environment. You will need to have a valid user login account to make a connection as the application will run under the logged in user’s context. This means that the user that will be used to authenticate to the environment should have the Administrator security role. If the user isn’t an administrator in the environment certain information may not be accessible and therefore will prevent the full set of reports from being generated. If you find that certain reports are not being created, please check the security role of the report user.
To create a new environment connection, navigate to the status bar area in the bottom left part of the application window. If you’re just started the application, it will say the words “Not Connected”. After clicking this button, a menu will be displayed that says, “Create new connection”. Clicking this button will display the “New connection” dialog where you can select one of the connection methods available.
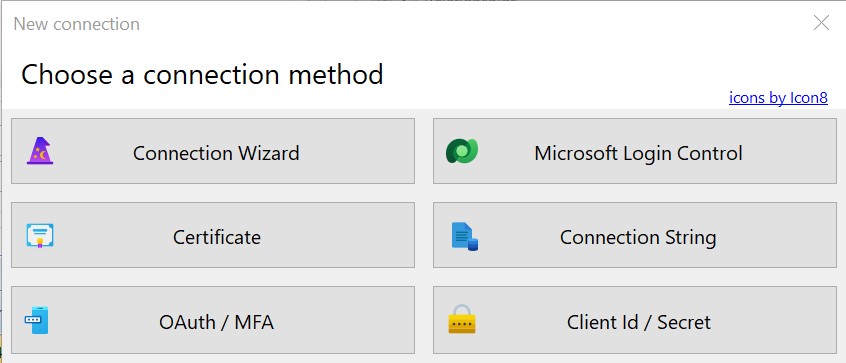
Microsoft has made a number of updates to the way we connect to environments making them more secure. The two recommended way to make a connection to your online environments is to use either the “OAuth/MFA” or “Microsoft Login Control”. Many organizations are taking advantage of multi-factor authentication or what is often called two-factor authentication. This authentication style requires the user to use multiple methods to validate their login. Keeping this in mind the “OAuth/MFA” option is typically the best authentication method. If you are connecting to an on-premises environment we recommend that you use the Microsoft Login Control as it is designed to accommodate on-premises connection methods.
Connection Types
If you are creating connections to an online environment, please read the following article.
If you are creating connections to an on-premises environment, please read the following article.